Tomorrow my friends are throwing a mermaid party for their daughter's 4th birthday. To go with the theme, they asked me to make a sandcastle cake complete with chocolate sea shells. Of course I said yes, and I've looked forward to making this cake for a while now. This was my first time making a tiered cake, and it was also my biggest cake I've ever made. Thankfully everything went smoothly and turned out great. Let me just tell you this now: this cake is TIME CONSUMING! However, its well worth it :)
 |
| First, you're going to make your butter cream frosting then set aside. |
 |
| Next, grab your sea shell candy mold and whatever color chocolate candy melts you choose. For my cake, we used pink and blue candy melts. |
 |
| Don't worry about how the back of them looks; you wont see them. |
 |
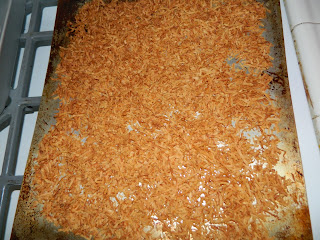
| Nice and evenly toasted! |
 |
| Once the coconut is cooled, you'll place it into your food processor (I used my magic bullet) along with the graham crackers and grind them up until it is all a sand-like texture. |
 |
| Once the coconut and graham crackers are ground, you'll toss them into a big bowl and add white and brown sugar until you reach your desired color. |
 |
| Add your seashells that you made earlier, and viola! You have a beautiful sand castle cake! Now go drink a margarita--you deserve it! |
BUTTER CREAM FROSTING:
Ingredients:
9 cups of powdered sugar
6 sticks of butter
1 1/2 tsp. of vanilla
water
Directions:
Mix all ingredients together. Add small amounts of water until you reach desired consistency.
"SAND" MIXTURE:
Ingredients:
Coconut
Graham crackers
Brown sugar
White sugar
Directions:
Toast your coconut by spreading out on a baking sheet and baking at 350*F for 10-12 minutes.
Once cooled, place your coconut and graham crackers in a food processor (I used my magic bullet) and pulsate until everything is evenly ground.
Place in a large bowl and add white and brown sugar until desired color is achieved.
SEA SHELL CHOCOLATES:
Ingredients:
Wilton candy melts in color of your choice
Wilton candy mold in seashell assortment
Directions:
Place candy melts into microwave-safe bowl and microwave for 1 minute. Stir, then microwave in 30-second increments until all chocolate is melted.
Spoon into candy molds being sure to reach every nook and cranny.


Thanks for this!! I found you on Pinterest, just looking for how to make the sand. So excited to try this!
ReplyDeleteEveryone at the party I made this cake for loved it; the "sand" tastes so good! I hope you like it!
DeleteCould I use only Graham crackers if there is a coconut b allergy?
ReplyDeleteAbsolutely! Youll just need more graham crackers and sugar :) ...have fun!
Deleteyozgat
ReplyDeletetunceli
hakkari
zonguldak
adıyaman
FC2BHA
Tokat Lojistik
ReplyDeleteKonya Lojistik
Mersin Lojistik
Karabük Lojistik
Samsun Lojistik
XCEPUP
BDDC6
ReplyDeleteAnkara Fayans Ustası
Düzce Lojistik
Hatay Şehir İçi Nakliyat
Yenimahalle Boya Ustası
Tekirdağ Boya Ustası
Gate io Güvenilir mi
Yenimahalle Parke Ustası
Kırklareli Şehirler Arası Nakliyat
Nevşehir Lojistik
8CF53
ReplyDeleteBinance Referans Kodu
Binance Borsası Güvenilir mi
Kwai Takipçi Hilesi
Bitcoin Madenciliği Siteleri
Twitter Retweet Hilesi
Linkedin Beğeni Satın Al
Aion Coin Hangi Borsada
Sohbet
Referans Kimliği Nedir
83FC161717
ReplyDeletewhatsapp güvenilir şov
9FB49F2021
ReplyDeleteskype web cam şov
104046187D
ReplyDeletegerçek takipçi
656C219FE6
ReplyDeleteinstagram turk takipci